This will be the most involved process, for sure. If you're organized/Type A/OCD/anal/(whatever word you deem appropriate here), like me, then chances are you already have a spreadsheet set up for your guest list. Perfect! It will probably only take a few tweaks to be mail merge ready. I'll start from scratch, though, to make things simple.
1. Create a new spreadsheet in your program of choice - we already know that my heart belongs to google docs, but since the majority of people are more comfortable with excel, I'm going to use that. I like to adjust my page setup to landscape and zoom in so I don't have to squint.
2. Set up your columns - the way you set this up depends on how you want your envelopes to look. For me, I wanted them to be in the following format:
Mr. and Mrs. Joe Blow
1234 Main Street
New York, New York
10010
Therefore, my columns were like so:
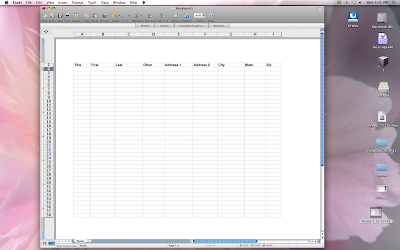
Title - for Mr. and Mrs. or Miss or Ms. or Dr., etcetera
First
Last
Other - I set this up for those envelopes that had a recipient name on a second line. For instance, two friends who are engaged and living together but not yet married or for children. Write this in exactly as you want it on the envelope.
Address 1 - for the street address
Address 2 - for apartment numbers
City
State - determine whether you want the full name or just an abbreviation
Zip
3. Fill in your data!

Prepping Your Word Document
The next step in this process is creating a mail merge template in Word. Unfortunately, Google Docs doesn't have a mail merge option (boo), so if you created your spreadsheet there you can just download it onto your computer, which we will need later.
1. Open up a new document in Word
2. Adjust your settings - since the default is set to 8.5 x 11, we need to make some adjustments to accommodate an envelope. I'm going to use the measurements for an A7 (5.25 x 7.25) envelope since those seem to be fairly common in the wedding world.
a. Go to "File" and click on "Page Setup"
b. Click the drop down arrow next to "Paper Size" and select "Manage Custom Sizes"
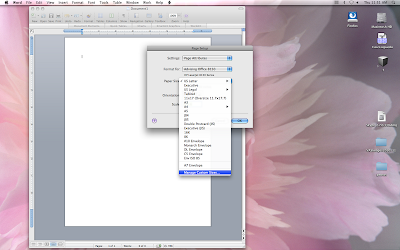
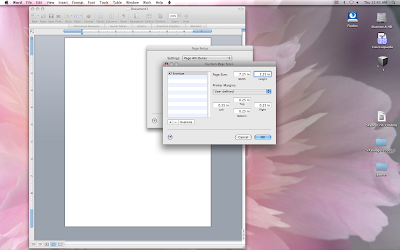
c. Change the name of your custom size by clicking once on the name listed. It should say untitled. If not, click the plus sign to add a custom size.
d. Change the Page Size to 7.25 width and 5.25 height (or whatever size your envelope is)
e. Change the Printer Margins if you need to. I set mine to 0.25 on each side (but you can leave them on the default settings if you want).
f. Click "OK" and then "OK" again.
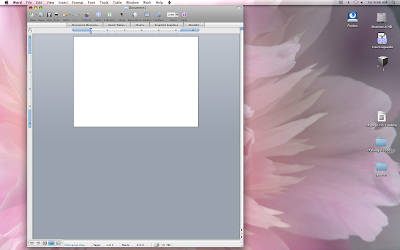
You should now have a document that looks like this:
3. Adjust your vertical alignment
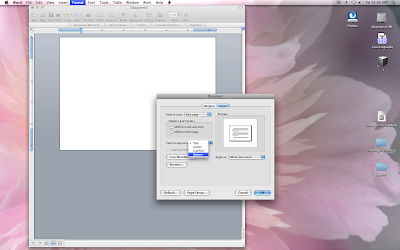
a. Go to "Format" and click on "Document"
b. Click on "Layout" (at the top)
c. Click the drop down arrow next to "Vertical Alignment" and select "Bottom"
d. Click "OK"
4. Adjust your horizontal alignment
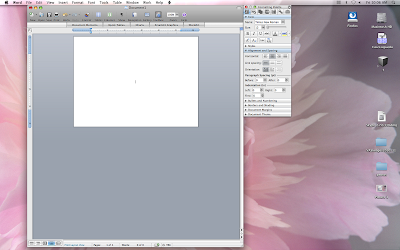
a. Make sure your Toolbox is open
b. Under "Alignment and Spacing" choose "Align Center"
Creating a Mail Merge Template
This next part might get a little tricky.
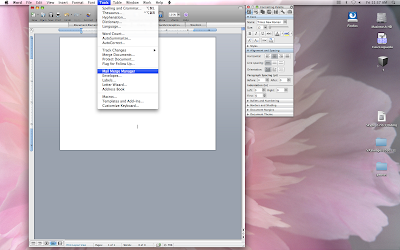
1. Go to "Tools" and click on "Mail Merge Manager"
2. A new "toolbox" should pop up somewhere. Under "Select Document Type" click on "Create New" and then "Form Letters" (You might notice that there is an "Envelopes" option - don't click on this or your formatting will get screwed up)
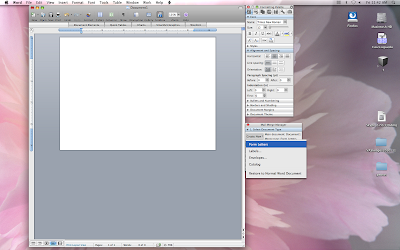
3. Under "Select Recipients List" click "Get List" then "Open Data Source"
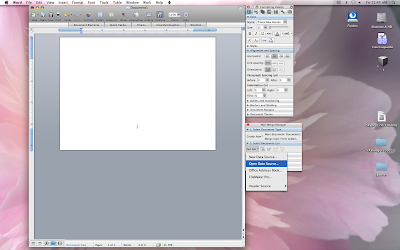
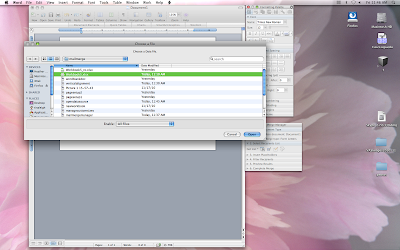
4. Navigate to your saved Excel spreadsheet and click "Open" (a warning might pop up, just click "OK")
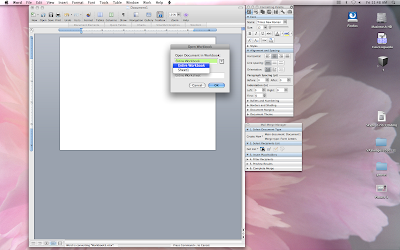
5. If another dialogue box pops up, like the one below, select "Entire Workbook" from the drop down menu and click "OK"
6. You should now see the column titles you created earlier under "Insert Placeholders." Drag these into your document one by one to set up your template, placing spaces and commas where needed
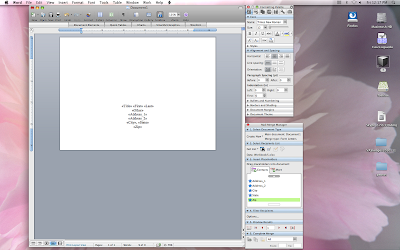
7. Now that you have the basic template, you can customize the font, size, color, etcetera
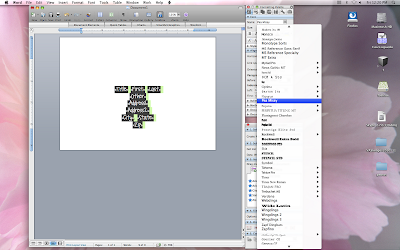
8. Almost there! Before you actually perform the mail merge, you can first preview to make sure everything is set up correctly. Click the "View Merged Data" button under "Preview Results" and use the red arrows to scroll through your data.

9. Now for some magic. If everything looks good, click on "Merge to New Document" under "Complete Merge"
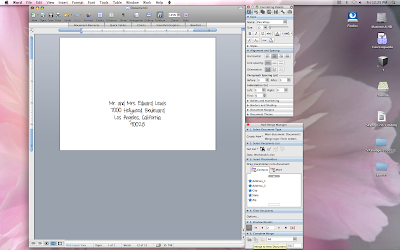
10. And Voila! All of your envelopes are in one document, ready to print.
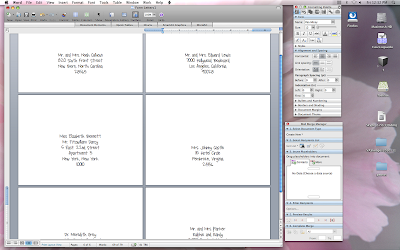
Now, if you only have five or ten addresses, it would probably be quicker just to copy and paste or re-type these into Word. For our save the dates, though, I had over 100 envelopes to print so this was definitely a time saver (especially since I already had a spreadsheet)! Also, if you want to do labels instead of printing directly onto the envelopes, you can do that through mail merge too! Just let me know if you want a separate tutorial on that.


This was so helpful for my co-worker and me. We've been trying to figure out a mail merge just for A7 envelopes to no success, until I found your post. Thank you!
ReplyDeletenice share mail merge
ReplyDeletethanks for information
Very easy to follow instructions. Just what I needed to print my wedding invitations. Thank you¡
ReplyDelete
ReplyDeleteĐịa chỉ in túi giấy chuyên nghiệp
bao bì màng Metalize
in vỏ hộp
in hộp đựng giày carton hà nội
in offset hà nội
công ty in vỏ hộp
In hộp thuốc tráng kim
thi công nội thất cửa hàng thời trang
ReplyDeletethi công nội thất cafe
thi công nội thất quán cà phê
thi công nội thất cửa hàng tại nghệ an